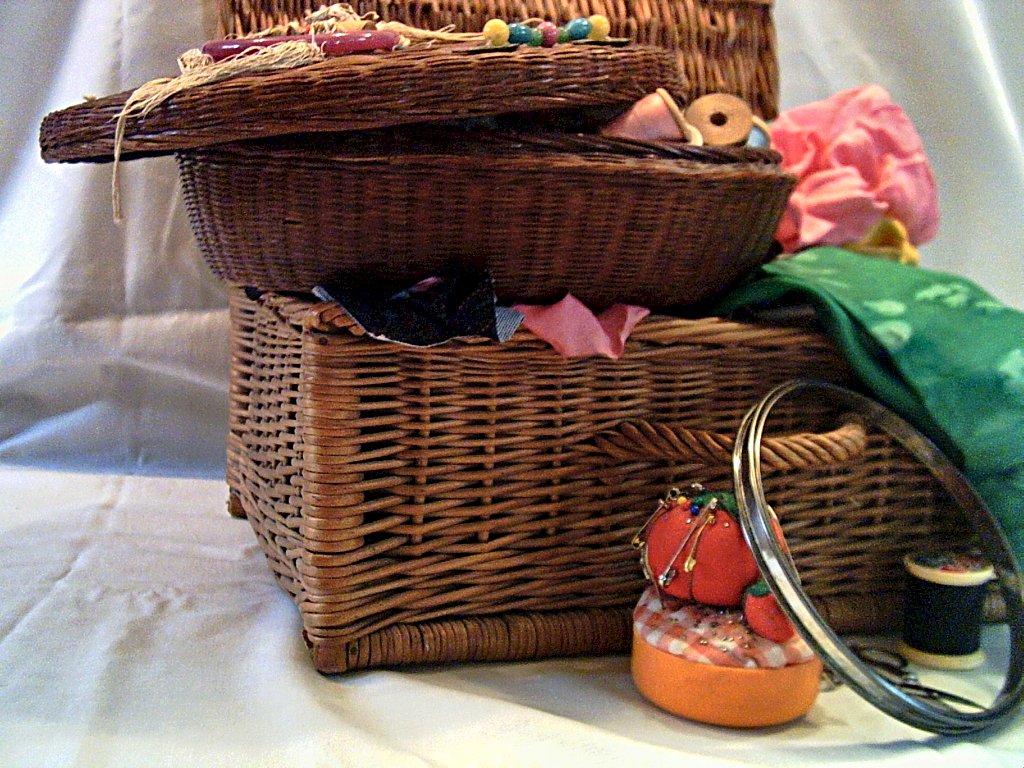
Metal pins are an invaluable tool for today’s needleworker and seamstress, and they were no less so for sewers throughout history. With pins came a variety of ways to store them, including boxes, cases and cushions.
15th-Century Debut
The first reference to the tomato pin cushion appears in the 15th century. Before this, as metal pins were rare and expensive, they were stored in a variety of protective cases made of bone, ivory or silver.
Tudor era
During the Tudor Era (1485-1603) it became common practice to use fancy, stuffed shapes to store needles and pins. The familiar tomato shape evolved due to the folklore surrounding the fruit, which symbolized prosperity and repelled evil spirits.
A Sign of Prosperity
A custom evolved whereby ripe tomatoes were placed on a mantel to ensure future prosperity. As real tomatoes were not always available, people created fabric tomatoes stuffed with sand or sawdust. Eventually, the stuffed, decorative tomatoes were used as pin cushions.
Victorian Era
The stuffed tomato pin cushion was further popularized in the Victorian Era. As parlor rooms became more opulent, the lady of the house displayed collections of pin cushions in various shapes (fans, dolls, shoes, fruits and vegetables), taking pride in their number and variety. The tomato pin cushion became a familiar presence.
Present Day
The most familiar pin cushion today is the red tomato. The strawberry tassel attached to the pin cushion is filled with emery and serves to clean and sharpen needles and pins.
Today on the blog it’s all about a dress recreation project: a dress of many patterns.
I’ve spoken about the idea of recreating a vintage, Edwardian-styled dress from the collection of the Huron County Museum & Historic Gaol. The plan is to recreate the basic pattern of a tea dress using swatches of recreated needlework items. So, it’s a reproduction on two levels: design & construction.
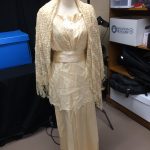
Heirloom 1912 wedding dress and shawl worn by Francis Mason Watson of Blyth in 1912. (Photo used courtesy of the Huron County Museum.)
The dress design will be based on an Edwardian Tea Dress-style wedding dress originally worn by Francis Mason Watson (1890 – 1918) a former resident of Blyth, Ontario. The shawl and dress will be made up of vintage pattern samplers (swatches) based on textile items in the Huron County Museum. Stitchers of all levels and techniques are welcome, beginner to advanced.
The needlework techniques used in the swatches will depend on the skills of the volunteers that take part. If there are tatting experts, for example, tatting reproduction swatches could be worked up and incorporated into the dress.
A visit with 1911 vintage
IA while ago, I enjoyed a visit to the museum and getting a look at the 1911 wedding dress in person. The simply lovely cream-coloured wedding dress dates from 1911. It’s even more beautiful in person – the images give just a hint of its charm. And so you can get a look too, here’s a collection of images of the dress…
The dress’s construction is simple, consisting of basic shapes (rectangles, triangles, and squares) and so would lend itself to a swatch contruction. Portions of the dress have a lovely silky sheen; I can imagine those portions would be lovely knitted or crocheted using a fibre with a sheen to it. Other portions of the dress are matte and would lend themselves to recreation using another fibre, perhaps a fine wool blend.
Let’s stitch some history
Would you be interested in joining in this creative reconstruction project? Needle workers & stitchers of all technique and skill level are welcome to join. The museum has a wealth of vintage textile items (such as knitting, quilting, crochet, embroidery) and you are sure to see a stitched item that would inspire you.
I’ve put together a number of the images of needlework textiles items from their collection. I’ve tried to include examples of crochet, knit, tatting, lace, and embroidery. There are many more textiles in the museum. Have a look at these examples…
Next steps
What do you think? Want to join us and stitch a sampler? The pattern you recreate or create (if you are inspired to make your own version) would then be published as part of a collection, Stitching Our History – a Collection of Needlework Patterns from the Huron County Museum.
Please note all photos are courtesy of the Huron County Museum & Historic Gaol and are used with permission. Thank you to Huron County Museum & Historic Gaol for their support.
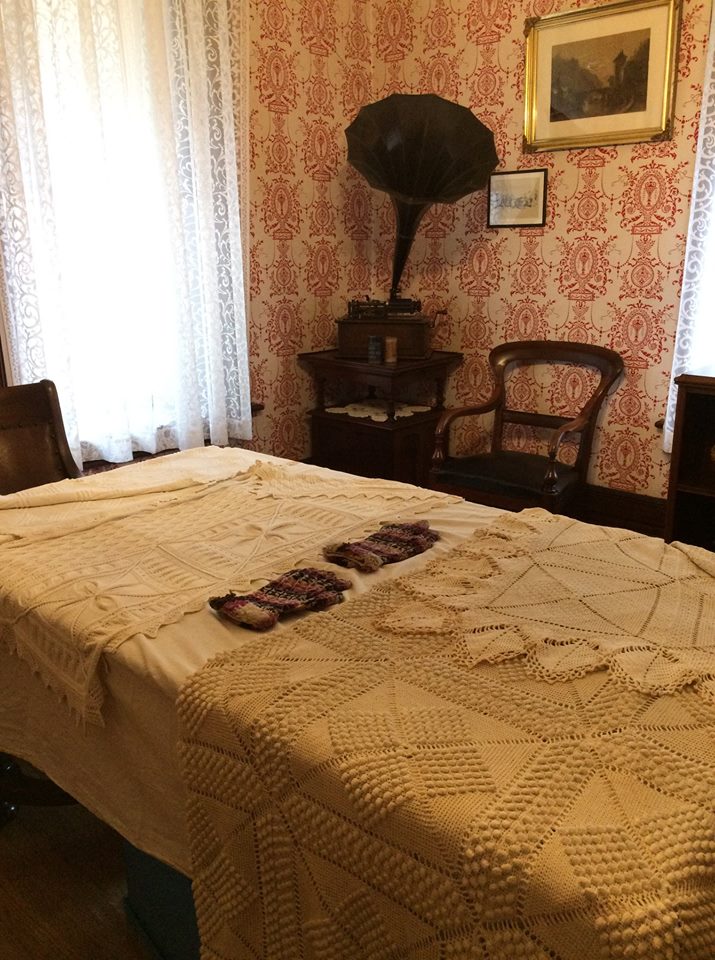
A small number of the Huron County Museum‘s many beautiful heirloom textiles were on display in the Governor’s House adjacent to the historic Gaol for Sunday’s counterpane knitting workshop in the parlour.
Starting from the left in the photos, you can see a counterpane crib blanket, a counterpane bureau scarf, a pair of knit men’s gloves (the pattern is similar to Sanquhar), and a crocheted counterpane bed coverlet.
There are so many more lovely items in their collection. These are but a few examples.
Would you or someone you know be interested in recreating patterns based on the heirloom textile items in the museum? Their collection holds many, many needlework items such as quilts, doll cloths, doilies, dresses, mittens and embroidered textiles.
And by the way, 2019 is going to be an exciting year for textile lovers – the museum has something very special in the works!
Thank you so much to everyone who attended the knitting workshop at the Gaol in the Goderich yesterday, Sunday, Dec. 9.
It was truly a pleasure to have the opportunity to meet you and share some creative time together.
And thank you also to Sinead and the Huron County Museum for encouraging me to share my work and for organizing and hosting the workshop in the wonderful Governor’s House.
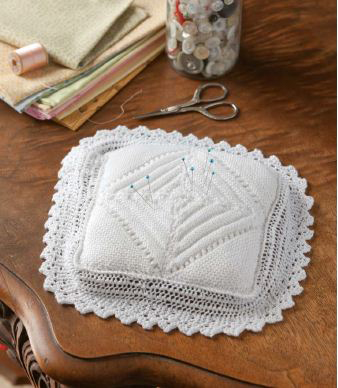
A counterpane pincushion, inspired by an heirloom counterpane baby blanket in the collection of the Huron County Museum & Historic Gaol located in Goderich, Ontario.
Do you love stitching from old patterns?
I certainly do. I also enjoy trying to recreate a pattern based upon a stitched item.
This pincushion is inspired by a white cotton counterpane baby blanket in the collection of the Huron County Museum and Historic Gaol in Goderich, Ontario.
White cotton counterpanes (or coverlets) were common in the nineteenth century, as was “white knitting,” due to the preference at the time for white bed coverings and because of the ready availability of cotton yarn.
Counterpanes are made up of smaller units (squares or octagons, for example) that are worked separately and then joined together to create an overall design or effect. They were traditionally knitted or crocheted in white or cream-colored cotton yarn. Patterns were numerous and could be quite intricate.
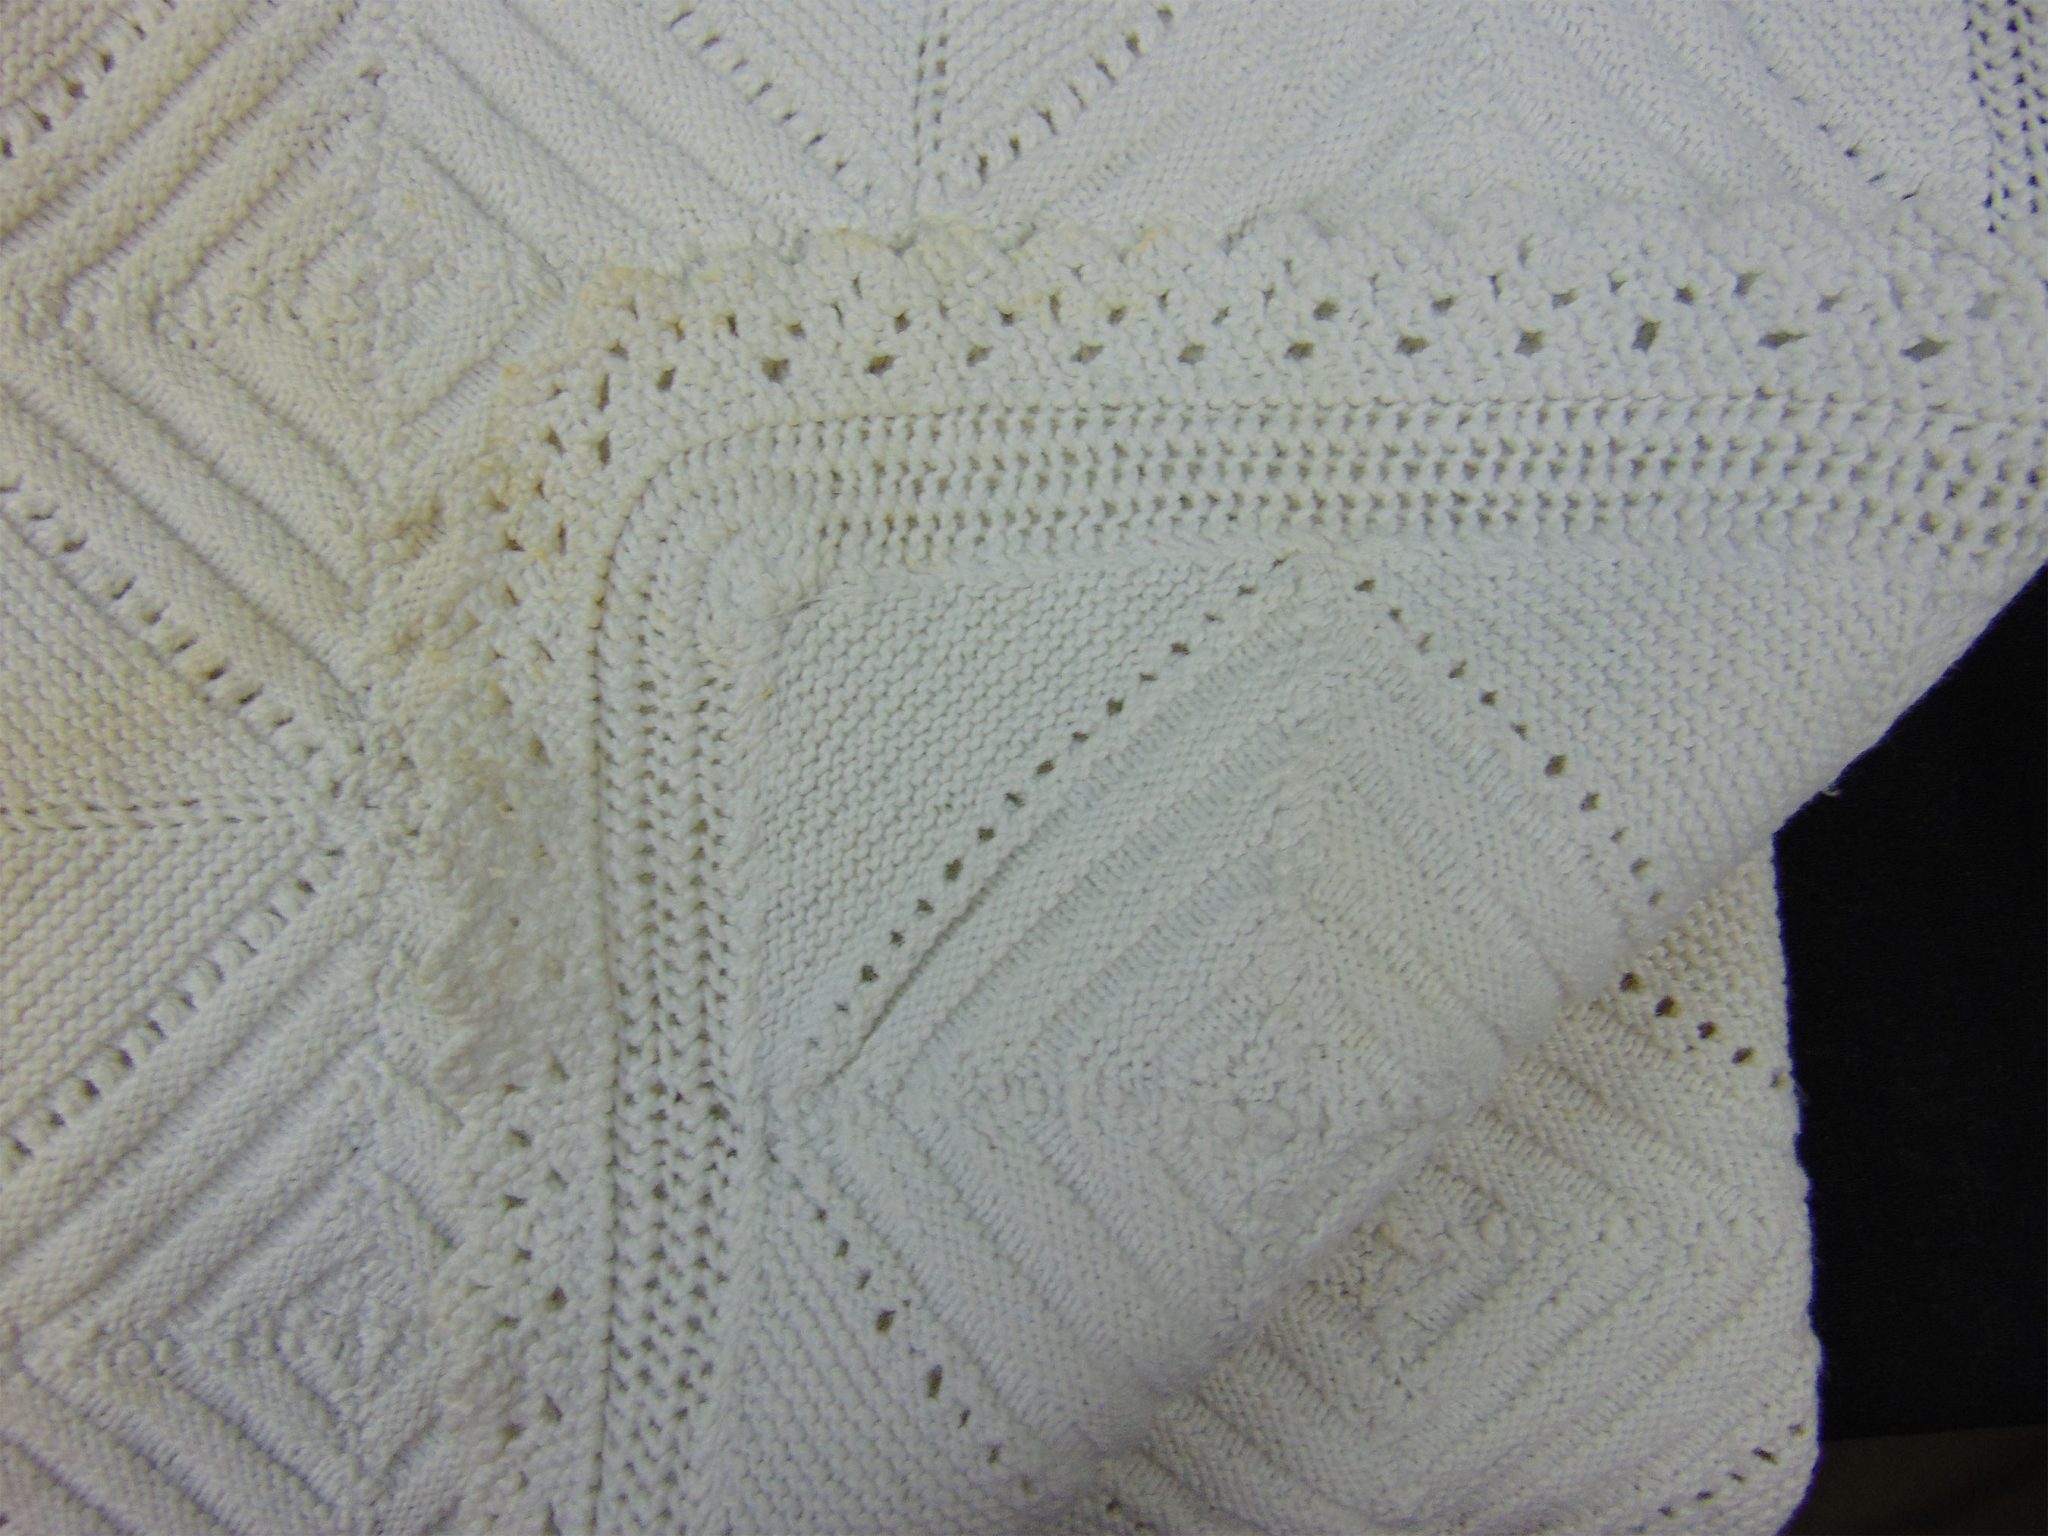
The heirloom original, the inspiration for the pincushion. A portion of the folded counterpane baby blanket can been seen in the photo. (Photo courtesy of the Huron County Museum & Historic Gaol)
Knitted about 1812, the white cotton counterpane in the museum’s collection is of a simple and lovely design. The blanket was constructed of 3-inch (7.6-cm) square units joined together, forming an overall On Point pattern: the eyelet spaces create the optical illusion of nested diamonds. Each unit is worked from one corner to the opposite corner, with garter stitch in the lower half of the unit, a row of eyelets through the middle, and alternating stockinette-stitch and reverse-stockinette-stitch ribbing above. The garter-stitch rows feature a yarn-over increase at the beginning of each row.
The front of the pincushion features the same overall layout as the museum’s crib blanket. On the reverse of the pincushion, the units are placed so that the yarn-over edges connect to highlight the lovely lace-like effect created when the yarn-overs are joined by a simple whip stitch. The knitted edging is a recreation of the original edging on the crib counterpane.
PINCUSHION INSTRUCTIONS
Pincushion Units
Make 8
CO 2 sts.
Next Row: Yo, k to end—1 st inc’d.
Rep last row 33 more times—36 sts.
P 1 row.
Eyelet Row (RS): K1, [yo, k2tog] 17 times, k1.
P 1 row.
K 1 row.
*Next Row (WS): K1, k2tog, k to end—1 st dec’d.
Next Row (RS): P1, p2tog, p to end—1 st dec’d.
Rep last 2 rows once more—2 sts dec’d.
Next Row (WS): P1, p2tog, p to end—1 st dec’d.
Next Row (RS): K1, k2tog, k to end—1 st dec’d.
Rep last 2 rows once more—2 sts dec’d.
Rep from * 3 more times—4 sts rem.
Next Row (WS): K1, k2tog, k to end—3 sts rem.
Next Row (RS): P1, p2tog, p to end—2 sts rem.
Next Row: K2tog—1 st rem. Fasten off.
EDGING
CO 13 sts
Row 1: K2, [yo, k2tog] 3 times, k1 [yo, k2] 2 times—15 sts.
Row 2: K8, [yo, k2tog] 3 times, k1.
Row 3: K2, [yo, k2tog] 3 times, k7.
Row 4: K8, [yo, k2tog] 3 times, k1.
Row 5: K2, [yo, k2tog] 3 times, k3 [yo, k2] 2 times—17 sts.
Row 6: K10, [yo, k2tog] 3 times, k1.
Row 7: K2, [yo, k2tog] 3 times, k9.
Row 8: BO 4 sts, k6 (including st rem on right needle after BO), [yo, k2tog] 3 times, k1—13 sts rem.
Rep Rows 1–8 until piece measures 25 inches (63.5 cm), ending with Row 8. BO all sts.
FINISHING
Wash all pieces and dry flat to block. For the front of the pin cushion, arrange four units so the ribbing sections align, and sew together using whip stitch. For the back, arrange four units so the yarn-over sides align, and sew together using whip stitch. Weave in ends. Sew front and back pieces together, leaving one side open for stuffing. Fold felted batting in half, fill to desired thickness with fiberfill stuffing, put into pincushion, and sew last side closed. Sew on edging using whip stitch. Sew ends of edging together.
ABBREVIATIONS
BO bind off
CO cast on
DEC decrease
K knit
K2tog knit two stitches together
P purl
P2tog purl two stitches together
RS right side
WS wrong side
YO yarn over
FINISHED MEASUREMENTS
6 inches (15.2 cm) square, excluding edging.
YARN
The sample was stitched with DMC Baroque, 100% cotton thread, bedspread weight, 416 yards (380.4 m)/75 gram (2.6 oz) skein, 3 skeins of White.
NEEDLES
Needles size 0 (2 mm) or size needed to obtain gauge.
GAUGE
36 sts and 72 rows = 4 inches (10.2 cm) in garter st; one unit = 3 inches (7.6 cm) square.
NOTIONS
Tapestry needle
Warm and Natural Felted batting, 6 x 12 inches (15.2 x 30.5 cm)
Warm & Natural Needled Cotton, the Warm Company
Small amount of fiberfill stuffing.